A very convenient and ancient method of rigging is the ”Drop shot fishing rig for bass”. Originally, it was an old Japanese fisherman trick. It’s a saltwater angling practice, initially, used to catch bass in high-pressure water but as time progressed this trick got more popular and has been more refined than ever.
Now it’s extensively used by fishermen all over the globe. The whole idea is to make rigging easier, with less equipment. This is an extensively used technique in the west. Due to this convenient method, beginners and pros benefit from this drop-shot fishing rig for bass. It is time-saving as compared to ancient methods yet very fruitful in the end.
Anglers all over the world adopt drop shot fishing rigs as the equipment used to come in handy both in fresh and saltwater alike. Bass, being the most popular and abundant fish in the blues are hooked in good quantity by fishermen.
Contents
Drop shot technique for bass angling -The most versatile finesse: Learn it!
To help you add more bass into your boat this season, you need to try this drop shot tactic. It’s a technique that requires rigging your hook overweight with a drop shot. It’s not like your regular worm fishing, but the weight here plays an important part in the judgement of your line. This simple technique has big implications.
Even if you are a beginner, you will be delighted to know you have landed on the correct platform to learn everything in detail about drop fishing rigs. You can learn this trick with these simple instructions starting from the basics.
Time and event matters-when to use drop shot rig?
This technique is used for and was even formulated for catching bass in choppy water or pressure water. In a drop shot rig, the weight transfers the bait, keeping it steady to attract the ravenous Bass. It is done to make sure that the bass gets hooked instantly.
The drop shot is a perfect option when you are undercover, your main target should be hard bottom shells like gravel or rock-coated bottoms. It lets you get a good idea of the depth you are playing in while catching bass.
Opting for the right rod for gruesome results:
First thing first, which rod to buy? A light to medium weight spinning reel or baitcasting reel or rod will be ideal. You can easily hunt a rod and reel combo online or if it’s accessible you can land into a fishing store.
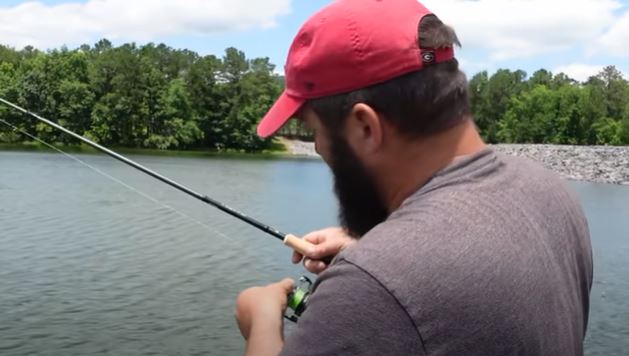
The reason behind getting a medium to a lightweight rod is that they easily bend, resulting in your baits looking more natural and more tempting, plus they will make fish detecting easy when they bite. The more flexible, the more chances of getting your bass.
Well, there are products and rods especially manufactured for the drop shot rig setup, but it’s not a must-have to perform this technique. If you are a beginner, you must know the technique, the rest can be done excellently with the above-mentioned rod too.
Be careful about thread tying with the braided line:
When it comes to thread be mindful and avoid attaching your lure directly to a braided line instead always go for fluorocarbon as they are thinner thus less visible to the fishes. This is what I always do and succeed.
Always select a braided line that is 10-20 lbs. (4.5-9.1 kg) for casting a bass weighing around 5-15 lbs. Next, thread this braided line to the eyelet of your pole. Slide onto the spool and roll in a counterclockwise motion for the unwinding of a few lines.
Now grab the free end of the line and run it through the eye of the pole. Now gently pull it from the eye, so your pole has an extended line of approximately 12-10 inches. This method is quite accurate as you will have good hand-eye coordination while angling.
Significance of attaching fluorocarbon to your braided line:
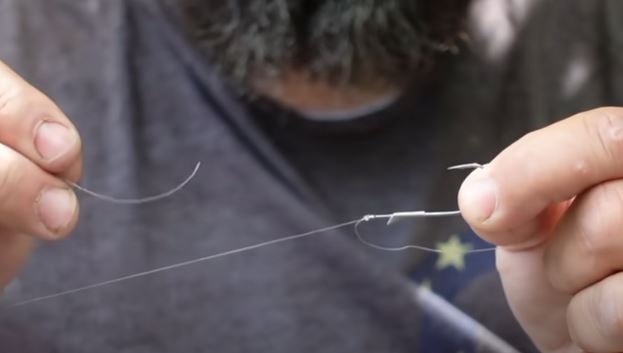
You will be needing a 15-18-inch-long fluorocarbon line weighing around 6-8 lbs., Now attach the fluorocarbon leader to your braided line, by simply using any of these knot styles: Palomar knot, Uni knot, or swivel knot. Using these fishing knots will avoid the leader from breaking loose and ensure the security of the leader.
The reason to use fluorocarbon is obvious. Yes! it’s lighter, hence won’t be visible to most of the fishes.
The correct way to secure the leader to the hook-A lesson to learn:
Select a drop shot hook of size 1-2 for the best drop shot rig setup. Began with threading the tag end of the leader into the eye on the hook, leaving behind a 6-8 inches long line. Again, use any of the knots like Palomar, swivel, or Uni Knot to secure the hook to the leader.
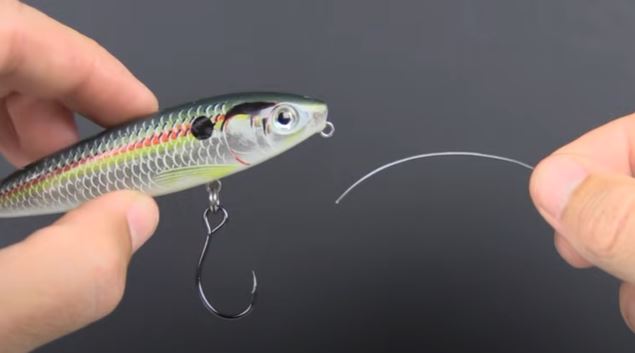
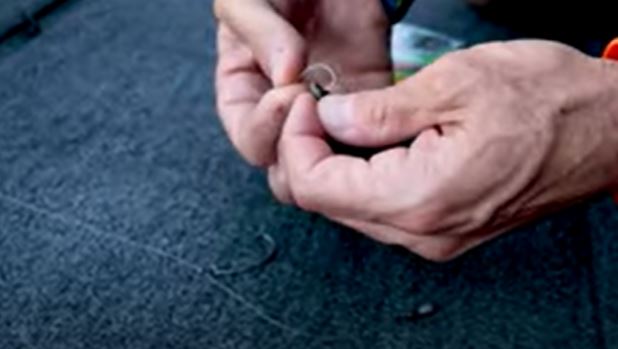
After tying the hook to the leader, the next thing you need to do is thread the tag end back through the eye, the hook should be pointing to the side and upwards. Once the hook is set in the right position, you should leave 10 -12 inches of slack at the end of your fishing lure for weight attachment.
The space is very important between the hook and the rod, as it defines the right place for weight assembling.
Finally, Bait attachment to the hook:
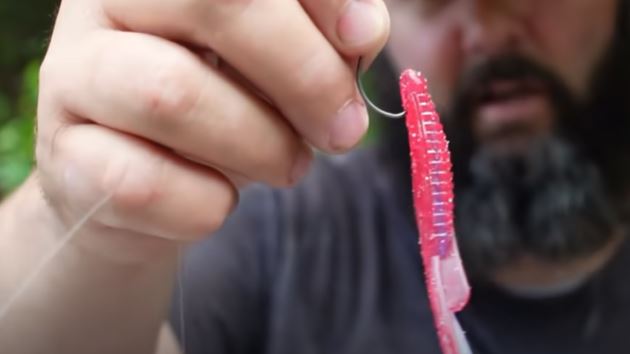
Get the bait and secure it on the hook. The perfect drop shot rig bait for your hook would be some live worms or minnows and nightcrawlers. As, they have long tails that current under the water, making them look more realistic and attractive to the bass.
The live worms or nightcrawlers attract bass and they want to devour it vigorously. Bait attachment is quite crucial as if not done properly, you have no chance to have fish for your feast.
Necessary equipment for drop shot
A 7-foot-long medium action spinning rod paired with a size 20 to 30 spinning reel:
The reason behind using this is simply because of the increased diameter of the spool. Bigger the spool lesser the line twists. The twists and tangling of the line can be a cause of hindrance thus you must have the right apparatus.
Use of a braid for the mainline along with a fluorocarbon leader:
Now mostly the fishermen use this combination so the fishes cannot see the thread, as fluorocarbon is thinner and less visible. They opt for 16 lbs. Test braided line with a fluorocarbon leader of approximately 10 lbs for better casting and hooking.
Use of swivel-rotation expert:
I am a great fan of swivel when it comes to attaching braid to the fluorocarbon leader, as it lessens the line twist. For me, a twist-free cast is a perfect cast.
Dropper line in leader length:
Whilst cold season angling, I would advise you to keep your dropper line length a little shorter, here I mean approximately 3-6 inches. The reason behind this is the bass position in winters, they stay closer to the bottom in this season.
Similarly, when it comes to the warmer season keep your baits length 12 -18 inches long according to the bass activity in this season increases.
Make your drop shot baits more attractive with an array of colors:
People usually paint their bait’s tail into striking colors like red and yellowish-green to attract the Bass’s attention. It is a known fact, that colors attract the bass to the core.
For boosting up your drop shot rig success rate, garlic-scented baits work wonders too and you end up getting more and bigger bites. The smell and aroma also entice the bass.
Try your luck with other potential baits that you are carrying in your box. You never know what might surprise you and turn in your favor. It is always good to have options so be prepared.
Exploring different Weights- a good fiddling:
Two important weights that we will discuss today and are fruitful for your bass angling are:
Tungsten finesse:
It’s a finesse weight. This kind of weight gives you an increased feel as it is made up of a harder material as compared to lead. It’s used mainly when faced with fishing rocks in order to get an impression of the bottom. It works perfectly well you use this up to get the idea of hard bottom areas while fishing.
Lead weight-a great help:
This is the best option when working with weeds, as it is lighter, and you don’t need a feel of the bottom as compared to when fishing in the hard surface bottoms.
Some useful advice:
You can have a variety of weights or simply have the right one. You must get habitual of the tools selection as the place and event of the scenario is different all the time.
My two cents on this are to buy a few weights of each type and test them for yourself, to get a better idea of the situation, and then cash your experience.
In the beginning, try to keep your bait selection limited and you can expand on it as you progress, catching up with more Bass in your bucket. You will get perfect with each passing day, so don’t be anxious in the beginning and play with your equipment for an upright experience.
Key points:
The ultimate drop shot rig for suspended bass is to allow the rig to sink deep right where you can spot the bass on your map and then keep it still, this is a tried and tested technique by the fishing legends. Make sure that your line still causes no movement. They express that it’s like playing a video game detection and hunting right away.
Remember no single drop shot rig technique is always the correct choice for every occasion, it can vary in different situations according to the reaction of baits in the water. So, act smart! You can have idea after watching this short video:
There are various minnow imitators available, they have a hovering impact too. For example, Berkley’s power bait (3 inches long) and Yamamoto’s shad shape worm. (4 inches long)
Another trick to attract the curious Bass is to try the Half Shell’s flat bottom, Yum’s kill shot (3 ¾ inch), jackal’s 4-inch Crosstail shad (1999), and zoom’s Z Drop Worm (4 inches).
Some more proven drop shot killers are Supple straight-tail worms, Zoom’s Finesse Worm, Larew’s Tattletail Worm, Luck-E-Strike’s Con Man worm, and Z-Man’s ElaZtec Finesse Wormz. These all are undulating baits.
Conclusion:
There are countless pockets on bass lakes all over the world where you can successfully pull off a drop shot technique. This type of knot is simple and easy to tie compared to some other complicated fishing knots, which take more time and practice to excel. A quick recap to tie this knot:
-> Depending on the depth you are working on cut the bait of your desired length. It also depends on the place you are fishing at.
-> Slide pass it into the eye of the hook, then pass it into the line’s tag end. Eye coordination is the most important.
-> Pull the track up until you have enough track at your end. Next circle it at the end of that tag and start pinching up the components which are twisted or overlapped. This smoothens your tracking ability too.
-> Again, seize the hook and transfer it in the loop and jerk the hook downwards.
-> Keep repeating this step until you get plenty of line thickness. Doing it at least 4-5 times would be best.
-> Now comes the knot tightening on the end of the tag. Always place the hook in correct position and a little far from the line. This is what ensures good casting.
-> Again, pull the beginning route to ensure proper tightening. Securing this is also beneficial, as it will avoid slipping too.
-> Duplication of the above two steps is guided until the node is tight and strong.
-> Now start tightening the knot back to the ends and always saturate the line for a harmless process.
-> Now the hook will be in a completely horizontal position coupled with your line, now add the drop weight to the end of the tag and put a hook on your bait.
-> All the above-given tips and techniques of drop shot rigging are ordained to make sure that you end up catching the bass in good quantity. We hope that by following these pieces of advice, you will gain experience and expertise in hooking bass for a lifetime.

Hi, I am David. I have founded THE FISHER CAST because I believe everybody deserve to do fishing smartly. I with my team are here to make this possible for our present and future generations by giving the best hands on practical experiences and reviews.

