Did you know using a dull ice auger can be dangerous? Yes, you heard it right! it can be a safety hazard. To avoid such incidents, sharpen your blades regularly for optimal performance with no extra effort. A dull blade takes more energy when pulled downwards so we have written a step-by-step guide about how to sharpen auger blades and keep them sharp.
When the blades are not sharp enough, you exert more pressure on the auger. Thus if your grip is not as required, you will directly fall on the ice with a massive fall, losing all your balance.
To maintain sharp blades all year round, all you need to do is sharpen them a few times every season and very importantly replace them once or twice a year, as per your use. This would keep them running efficiently without any hassle and minimize your potential safety hazards.
For beginners if you are curious about what is an ice auger and how to use in ice fishing then there you go, it’s a handheld tool with blades, used for drilling fishing holes in the ice. They are also known as ice drills. Let’s proceed to know how to sharpen auger blades;
Contents
Regular inspections-Keep your eyes open
It will help you to maintain sharp and nice blades every time with minimal effort. By inspection here means you must look for every area closely if it needs any special attention. Maybe you won’t need to sharpen it after each session. These regular inspections give you a good idea of how often your blades need polishing and care.
What to avoid while sharpening
Remember never to sharpen your auger blades with a grinder. A big NO-NO!
If you are thinking it’s safe to cool them in water and then use the grinder for sharpening. I would suggest not to do that too, as most of the time, it will spike the temperature on the thin edge with continuous friction and you will end up ruining it as they would soften up and will not stay sharp anymore.
Ways to sharpen your blades effortlessly
Now, there are two popular ways to sharpen your dull blades efficiently and save all those extra bucks and it is time-saving too, no more mailing and waiting for them to arrive back. Do it yourself at your home only. Yes, you got it right. You can do it yourself fellows!
Of course, you need to invest time and keep practicing for impressive results. It works fine with both sandpaper and if you prefer you can opt for the other way using a whetstone.
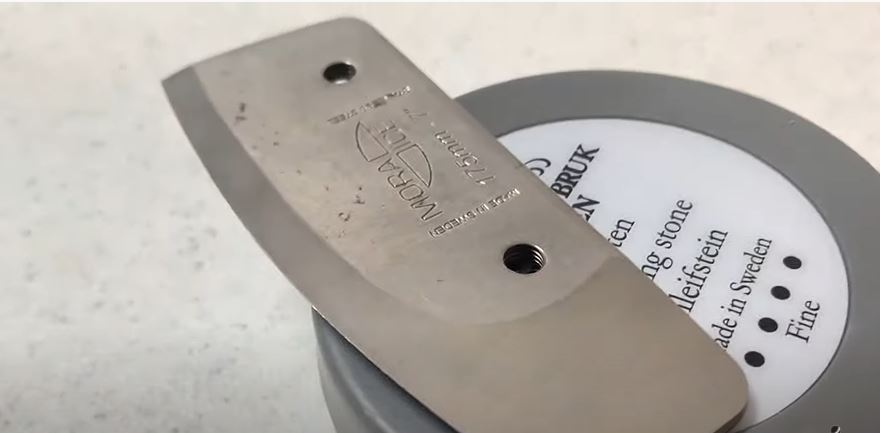
Whetstone is a fine-grained stone typically used for sharpening the edge on the blades. As the name suggests, it has a connection to water. Yes! it must be soaked in the water before and during use too. Water will serve here as a lubricant and will aid in stripping the metal particle built upon its surface.
Whetstone is available in different variety of coarseness in accordance with the numerical value, its grit’s finesse increases with an increased number. The grit basically determines how much metal is to be carved with each attempt.
I would suggest beginning with the lower grit number whetstone and progressing to the higher grit number when you are ready to polish the freshly revealed layers of the metal. As explained below:
For the polishing effect to make it all shiny:
Use an ultra-fine whetstone with a grit number as high as 5000
For exposing new layers, removal of old layers:
Use a whetstone with a lower grit number, as it’s very coarse and will strip away the first metal layer to reveal new layers.
A step-by-step guide to sharpening your auger with a whetstone:
If you are looking for some frugal money-saving auger sharpening way, then go for a whetstone. It’s an efficient and ancient method which was used by our forefathers too. It doesn’t need steel or synthetic materials and results in razor-sharp and smooth blade edges, almost like new.
Things you will require:
Of course, you will be needing some materials to get your work done,
First, you will need three whetstones of different grits i.e.: coarse stone, medium stone, and an ultra-fine stone. Next, a permanent marker, and lastly arrange a pail of water for soaking and dipping your stone throughout the process for lubrication.
Method:
Step 1
Groundwork: the extreme basic:
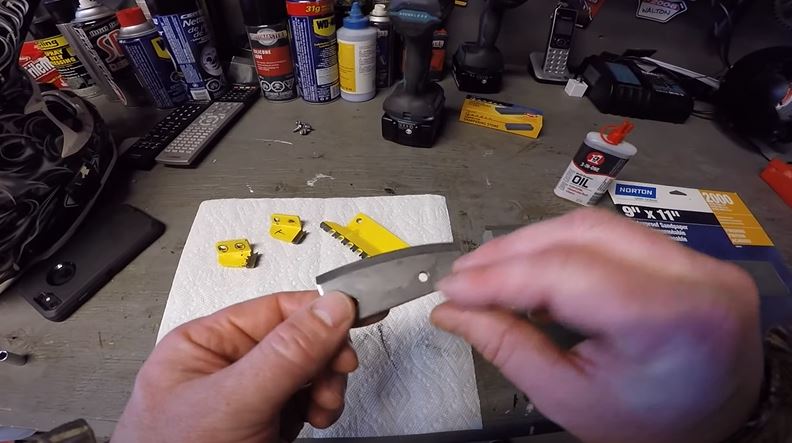
Began the procedure by soaking up your whetstone in the pail of water, on one hand, now carefully examine your auger for those areas that need care. Like rust, nicks, and chips. Any area which needs some polishing.
Now when you will look closely, each blade has three different surfaces called bevels. You will work on one level at a time, as they all need special treatment. Always start with the primary bevel.
Step 2
Marking the right area:
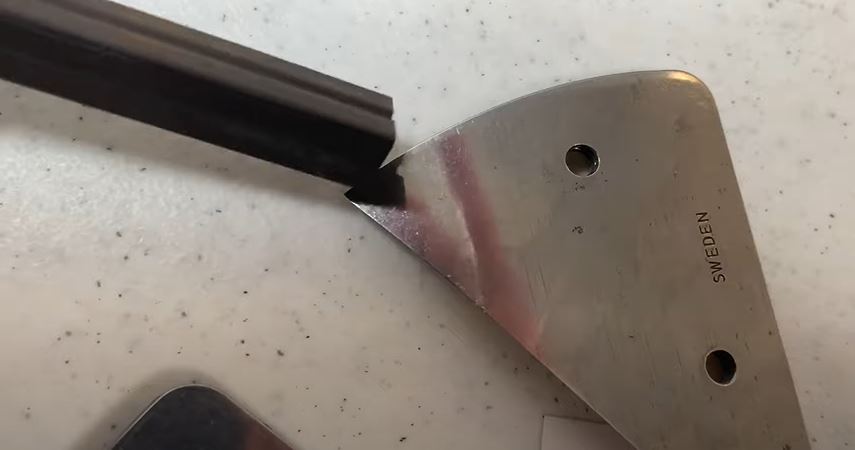
The next step after inspection, is coloring the entire blade with the marker, don’t go for a thick coat. This coating will help you in proper sharpening, and you won’t miss any spot while sharpening, as the new layer will be revealed, and marker coating won’t be visible any longer.
Step 3
The primary bevel sharpening:
Hold the first blade that needs sharpening and mark the primary bevel – the largest angled surface onto the blade.
With lower grit whetstone, work in a sweeping direction. Slide the primary bevel across the whetstone. The sweeping direction should be going against you, only one long stroke at a time in one direction should be implemented. Continue doing it until you reach the mark and the stain completely vanishes away.
Step 4
The secondary bevel Polishing-The intricate layer:
The secondary edge of your blade is the most important blade of all three, it’s the one that separates and lifts all the ice. Its job is to turn the entire blade edge tougher. So, handle it with care, feel the cutting edge on the secondary bevel with fingers and on the sharpening, stone lay it flat gradually.
Stroke In a sweeping motion to eliminate all the metal particles and dents. A few strokes will be enough, after this, you can continue to polish using a sharpening stone. In this step try not to make any contact between the primary bevel and the stone.
Step 5
The back bevel honing:
This is the last and the smallest surface you will need to polish up to end the entire procedure of sharpening your drills. Don’t miss out on even the tiniest angle of your ice drills blade. The angles could be small, but they are equally important. Moreover, the step is a reinforcement of the same step as done for the secondary blades. The best technique here is to be extra gentle.
For this bevel gentle strokes are advised, with all the extra care using your ultra-finest stone. Again, lay it flat align with its angle, and gently stroke it a few times. By this time, you would have super shiny, and sharpened blades ready for drilling.
Points to remember:
Throughout the entire course, wetting stones should be lubricated with water.
Remove all the marker markings on the blade to have a shiny sharpened blade.
Be gentle and don’t exert extra pressure while polishing the blades.
Opt for the right grit stone for different bevels accordingly.
The Sandpaper Method:
Using Sandpaper is another way to sharpen your auger blades and achieve an ice shredding sharpness. Dull blades won’t do you any good in fact they would be useless in icy water.
Material required:
This is the easiest and simplest way to sharpen your blades, you would be surprised to know that even professionals use this method for augers. But again, bear this in mind, the sandpaper method is only recommended when your augers are not damaged and only need sharpening.
For this technique, all you need is some elbow grease and of course sandpaper, of three different grits ranging from coarse, medium, and ultra-fine one. sandpaper can be dry or wet kind. Both will work fine.
Step by step method for sandpaper method:
Step 1
Preparation and Inspection:
For smooth process work on a hard surface, heavy glass, or for the best result try working on three ceramic tiles, one tile for each grit of sandpaper. Cut out a piece of sandpaper from different grit sandpapers, cut-outs should be a little smaller than the tiles.
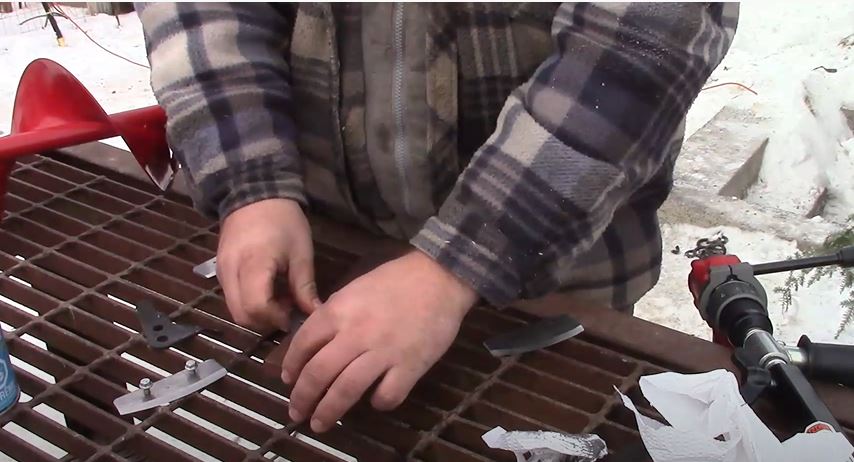
Start with removing your auger blades and carefully inspect for dents, rust, and chipped areas to work better.
Step 2
Now wet your blades with water and follow up the same technique that was used before for the whetstone method. But here you would use sandpaper instead of the whetstone. For the back, bevel remember to be gentle and repeat the same steps with the sandpaper
Step 3
Polishing:
You are now on the final touch-up polish, the edges of the auger blade using ultra-fine sandpaper until a razor-sharp blade is achieved.
Tips and precautions for razor-sharp auger blade edges:
Here are a few tips and precautions I would suggest for prolonging the life of your auger and would guarantee the protection of the blades. Take these measures and enjoy your angling session, because as they say prevention is the best cure. Let’s have a visual experiment:
Avoid dirt and debris:
It’s not unusual to find dirt buildup, sand, and other debris on lakes, snowmobiles, and other such places. So, it’s a good idea to search for a clean spot to drill your hole and keep your equipment nice and clean to increase their life.
Never bang your Auger:
We all know, the strong urge we hold, to bang the auger hard on the ice and speed up the hole drilling process, and get going. But in the long run, it would certainly damage your auger blades and will cost you some extra bucks each year on maintenance. So, the point here is to be patient and let the machine complete its task on its own.
Blade protection and safety:
When it comes to storing your equipment especially your blades, remember to keep them away from metal items that could bang or rub with each other and could potentially dent your blades.
These days the new augers are available with covers for safety and protection. If you have old ones without protector cups, there is a piece of good news for you, the covers are available separately too. You can invest a few bucks in protector cups and save a lot of bucks in the future. Proper storing will ensure their long life ahead.
Time and inspection
Take out some time to inspect your auger after each session and learn the polishing and sharpening techniques and keep practicing it for a while, you would get a hang of it. It will improve your overall fishing experience and keep you sorted in the future.
Final Note
When there is a will there is a way. If you have your heart set on angling, you will definitely learn the way to keep your auger blades nice and sharp yourself, rather than sending them to factories and spending excess money on their maintenance.
Practice will make you master the art of sharpening but remember to be patient and gentle. By following the above-mentioned steps and tricks you will manage to achieve ice shredding sharpness of your auger on your own. Give it a go and happy auger sharpening day to you!!
Hi, I am David. I have founded THE FISHER CAST because I believe everybody deserve to do fishing smartly. I with my team are here to make this possible for our present and future generations by giving the best hands on practical experiences and reviews.